In today’s fast-paced tech landscape, 3D scanning technology is no longer exclusive to industrial giants—they’ve become essential tools in fields like design, heritage preservation, and even personal creative projects. Whether you’re capturing intricate details for reverse engineering or bringing physical objects into the digital world, structured light industrial 3D scanners open up a world of possibilities.
In this guide, you’ll learn how to set up your XX-3DTECH 3D scanner step by step—from unboxing the components to getting your first 3D model ready. Let’s unlock the full potential of smart manufacturing, one scan at a time.
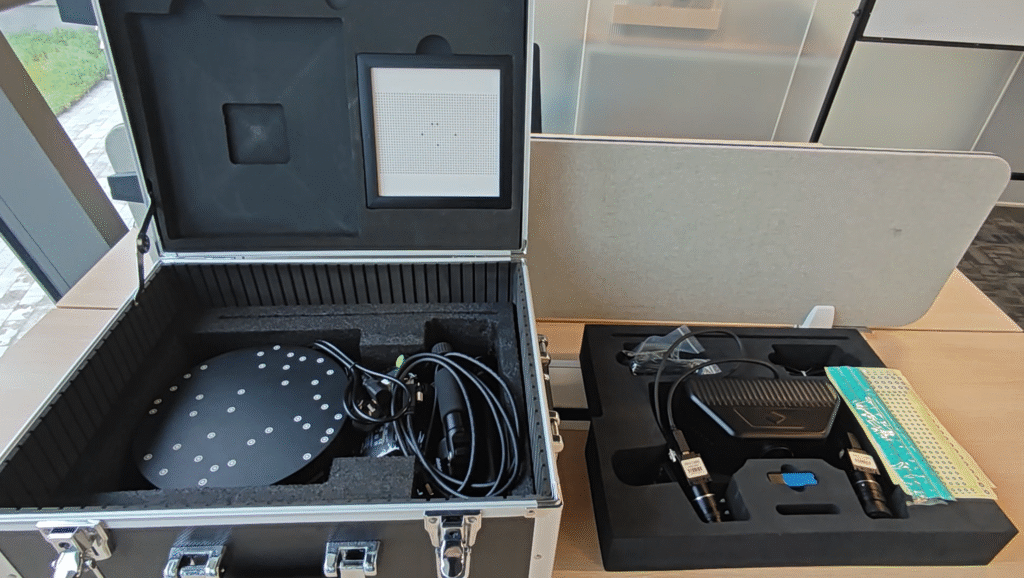
Step 1: Unboxing – Check Your 3D Scanning Equipment
Once your XX-3DTECH 3D scanner arrives, place the sealed box on a clean surface and inspect it for any signs of shipping damage. Open it carefully and check the contents against the provided accessory checklist. Typically, your 3D scanning equipment should include:
- The 3D scanner main unit
- Power cords and USB cables (including USB 3.0)
- A sturdy tripod
- A quick-release plate
- A turntable (if applicable)
- A security dongle
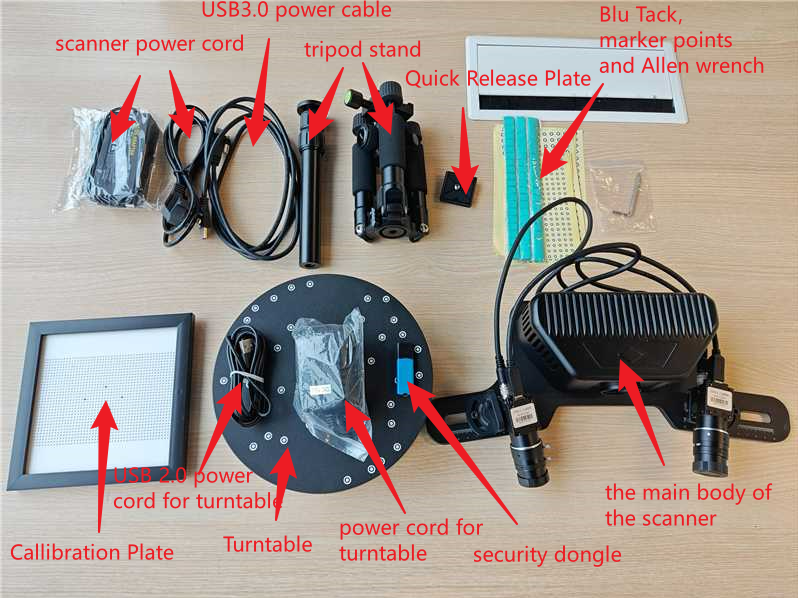
Different models may come with slightly different configurations, so make sure everything’s accounted for before moving on. A missing cable or accessory can lead to installation issues—so this step, while simple, is crucial.
Step 2: Hardware Setup – Building a Stable Scanning Base
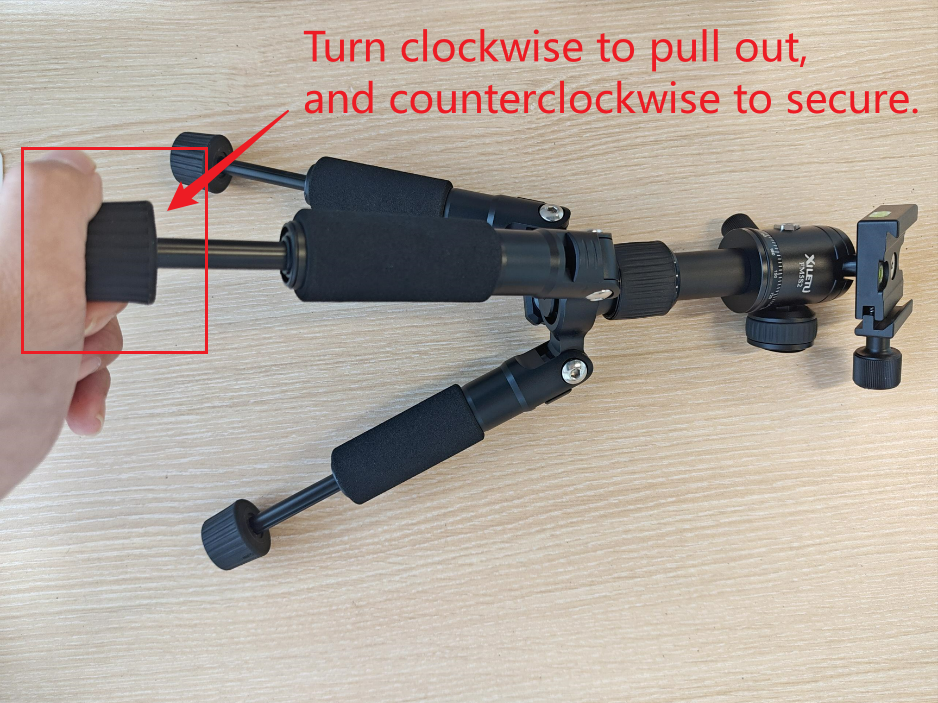
Start with the tripod. Unfold the three legs and adjust their height as needed. Loosen the central knob by turning it clockwise, extend the legs to the desired length, then twist it counterclockwise to lock in place. A stable tripod forms the backbone of accurate scanning.
Next, install the quick-release plate onto the bottom of the 3D scanner main unit. Tighten it firmly—it’s the connection point between your scanner and the tripod, and it needs to stay secure. Then, mount the scanner onto the tripod by inserting the plate into the tripod head and rotating the side knob to lock it in place.
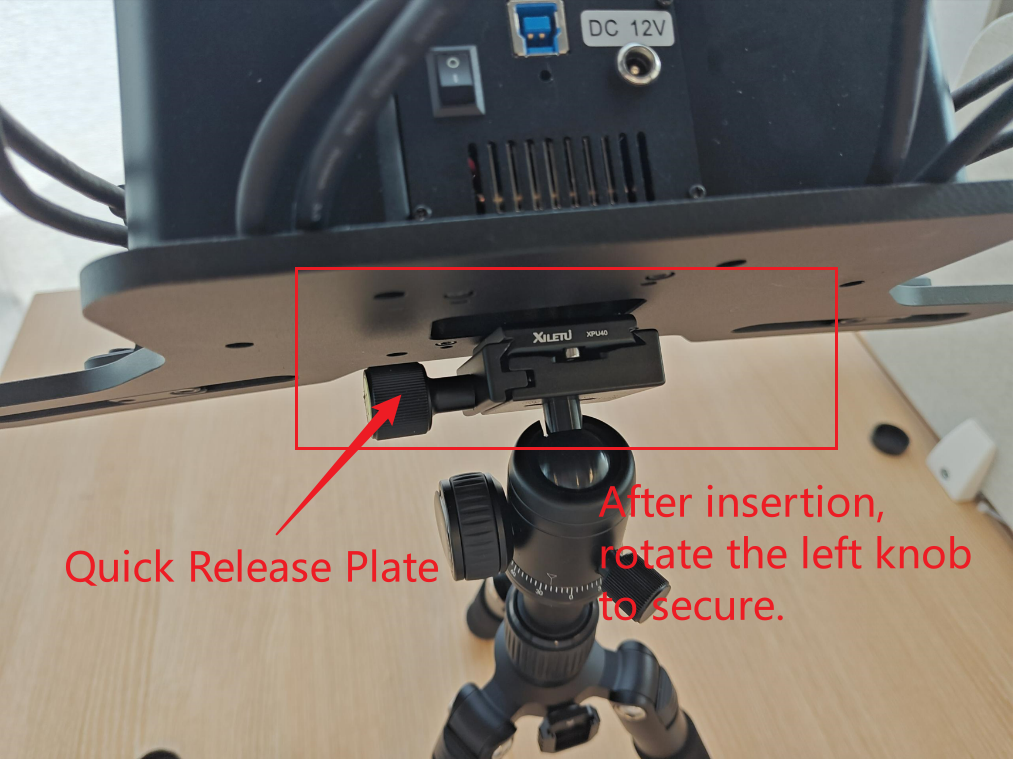
Your scanner is now physically set up and ready for connection.
Step 3: Wiring – Power Up and Prepare for 3D Modeling
Now it’s time to connect everything. Here’s how:
1.Turntable (if included):
- Plug the USB 2.0 cable into the bottom of the turntable and connect the other end to your computer.
- Plug the power cord into the upper port of the turntable.
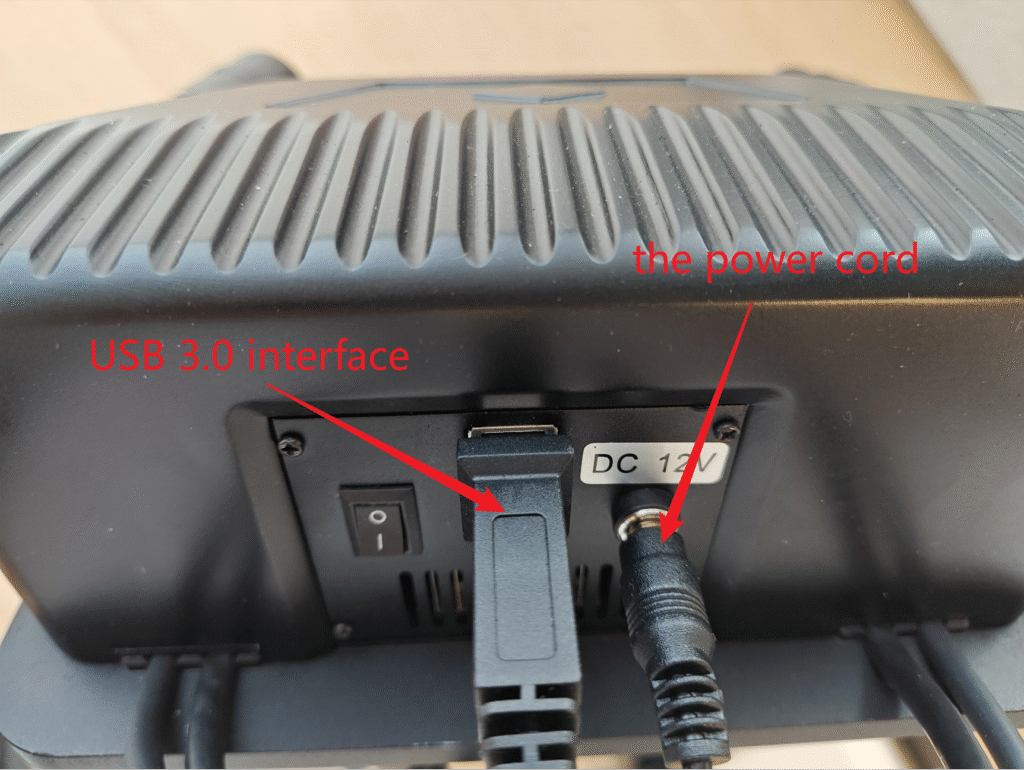
2. Scanner:
- Connect the USB 3.0 cable to the back of the scanner and your computer.
- Insert the power cord into the scanner’s power port.
- Insert the security dongle into a free USB port on your computer.
Once everything is connected securely, power on the system. Your 3D scanner should light up and be ready for action.

Ready to Scan? Let the 3D Scanning Technology Begin
With your hardware set up and powered on, you’re now ready to dive into the world of 3D modeling. Whether you’re scanning intricate textures or complex shapes, the process is intuitive—just follow the user manual or software prompts to get started.
Mastering your 3D scanner doesn’t take long. With practice, you’ll be capturing high-precision models in no time.
Need More 3D Scanning Tips about industrial 3D scanner?
Setting up your XX-3DTECH 3D scanner is only the beginning. If you’re looking to improve your scanning workflow, explore new applications, or solve specific setup issues, be sure to follow us for more professional 3D scanning tips.
Subscribe Our Channel
XX-3DTECH (Xiangxi Intelligent technology) is a national high-tech enterprise focusing on the core components of micro and nano 3D machine vision. We have the core hardware design and development capabilities, parts and finished product manufacturing capabilities and professional software development capabilities of 3D machine vision. We have developed several machine vision products which include 3D AOI core module, 3D structured light, structured light 3D camera, structured light 3D scanner and structured light 3D inspection machines, and we have more than 20 core technology intellectual property rights such as invention patents and software copyrights.